How to Use Liquid Rubber for Effective Waterproofing Solutions?
Waterproofing is a critical factor in construction and maintenance. Recent industry reports indicate that nearly 30% of buildings face significant water damage over their lifetimes. Liquid Rubber has emerged as an innovative solution for tough waterproofing problems. This versatile material creates a seamless and elastic barrier that can adapt to various surfaces and conditions. Its ability to withstand harsh weather, including heavy rains and extreme temperatures, makes it particularly valuable.
In the past decade, the demand for Liquid Rubber products has surged. As per a market analysis, the liquid rubber market is projected to grow by 10% annually. This growth stems from increasing awareness of eco-friendly and durable construction materials. Liquid Rubber stands out for its ease of application and effective long-term results. However, proper usage and application techniques are crucial for optimal performance.
Despite these benefits, some challenges persist. Many users report difficulties in achieving the ideal thickness during application. This inconsistency can lead to potential leaks, undermining waterproofing efforts. Assessing the application methods and conditions is essential for maximizing Liquid Rubber's effectiveness. Continuous improvements in techniques will help refine the waterproofing process and contribute to better results.
Understanding Liquid Rubber and Its Properties
Liquid rubber is increasingly recognized as a revolutionary solution for
waterproofing applications. Its unique properties make it ideal for various surfaces. Liquid rubber adheres
well to concrete, wood, and metal, forming a seamless barrier. According to recent industry
reports, liquid rubber can reduce water penetration by up to 95%. This
permeability resistance is crucial in areas prone to moisture damage.
One of the standout attributes of liquid rubber is its elasticity. It can stretch and
compress without cracking, which is vital for surfaces that experience movement. The material typically
withstands temperatures ranging from -40°F to 300°F. This versatility is important because many
waterproofing solutions fail under extreme conditions. However, it’s essential to apply liquid rubber
correctly to achieve the desired results. Improper application can lead to peeling or
reduced effectiveness.
The drying time of liquid rubber can vary based on environmental factors. Humidity, temperature, and
thickness of the application all play roles. It often takes several hours to dry, but full curing can
extend to days. This can be frustrating for those in a hurry. Understanding these details can help
users make better decisions when executing waterproofing projects. It may also require planning to ensure
optimal results.
Preparing Surfaces for Liquid Rubber Application
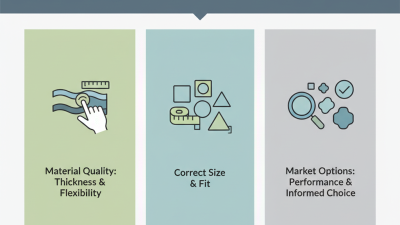
Preparing surfaces for liquid rubber application is crucial for optimal results. Clean surfaces are a must. Remove dirt, grease, and debris thoroughly. A simple wash with soap and water can help. For tougher stains, consider using a pressure washer. Dry the area completely before applying the liquid rubber. Moisture can interfere with adhesion.
Inspect the surface after cleaning. Look for cracks or imperfections. Fill any gaps with a suitable filler. This ensures a smooth base for the liquid rubber. You might find uneven areas that need addressing. Sand down rough spots for better adhesion. A flat surface often provides better results.
Finally, take precautions. Ensure that the area is well-ventilated during application. This helps avoid fumes buildup. Wear protective gear, such as gloves and masks. While you can achieve great waterproofing, the preparation phase is critical. Skipping steps can lead to failures in the long run. Each surface requires attention, so don’t rush the process.
How to Use Liquid Rubber for Effective Waterproofing Solutions? - Preparing Surfaces for Liquid Rubber Application
| Surface Type |
Preparation Method |
Drying Time (Hours) |
Recommended Liquid Rubber Thickness (mm) |
| Concrete |
Clean with pressure wash, fill cracks |
2 |
1-3 |
| Wood |
Sand the surface, remove dust |
4 |
1-2 |
| Metal |
Degrease and roughen surface |
2 |
2-4 |
| Plastic |
Clean with solvent, roughen edges |
3 |
1-3 |
| Asphalt |
Clean with pressure wash |
1 |
2-5 |
Step-by-Step Guide to Applying Liquid Rubber
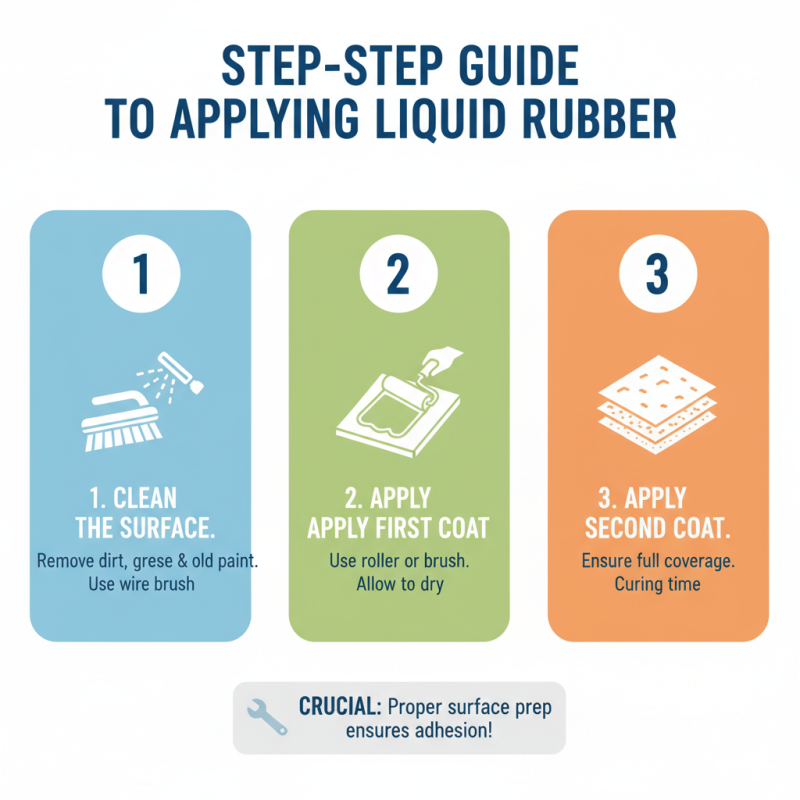
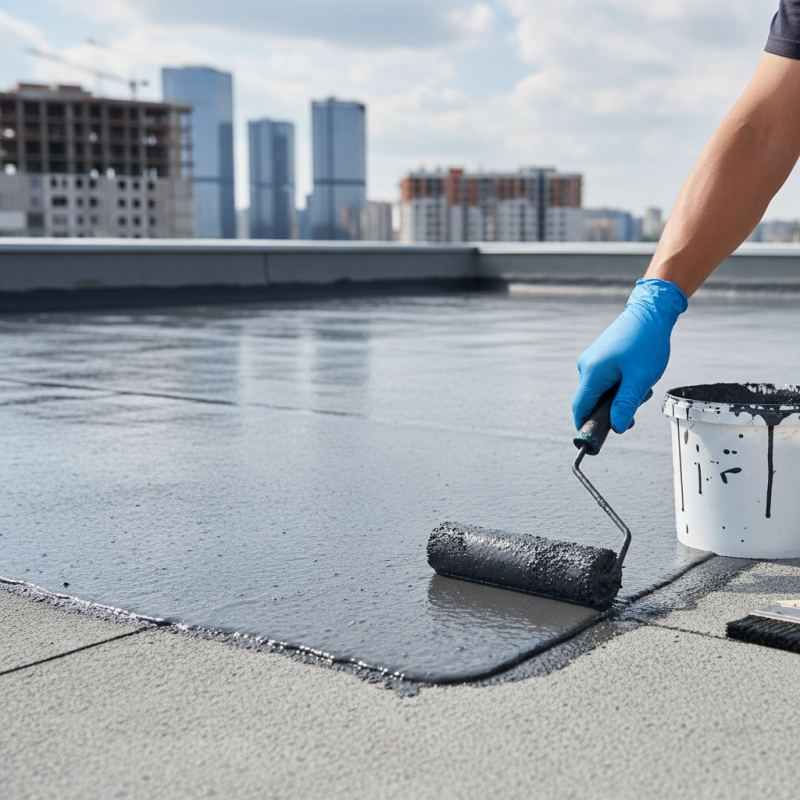
Applying liquid rubber for waterproofing can be straightforward. Start by cleaning the surface thoroughly. Remove any dirt, grease, or old paint. Use a wire brush or scraper for tough spots. This initial step is crucial; otherwise, the coating may not adhere well.
Next, prepare the liquid rubber. Ensure it is well-mixed according to the instructions. Use a paint roller or brush for application. Apply an even coat, working in small sections. Pay attention to corners and edges; these areas often need extra attention. Allow the first coat to dry fully before applying a second layer. The drying time varies based on humidity and temperature, so be patient here.
After the second coat, inspect your work. Look for any missed spots or thin areas. If you see imperfections, touch them up with more rubber. This final check can make a big difference. Remember, every project has its lessons. Take notes on what worked and what didn't.
Common Mistakes to Avoid When Using Liquid Rubber
When using liquid rubber for waterproofing, avoiding common mistakes is crucial. Many people forget to prepare the surface properly. Clean the area thoroughly to remove dirt and debris. This step ensures better adhesion. Skipping it often leads to peeling or bubbling. Additionally, not allowing enough drying time can ruin your project. Each layer needs proper curing time. Impatience can cause failures down the line.
Another frequent error is applying too thin a coat. Liquid rubber needs sufficient thickness for effective waterproofing. A single, thin layer may not provide the protection you need. Test the product beforehand to determine the right consistency. On the flip side, applying too thick a layer can also be problematic. It might not cure correctly, resulting in an uneven finish.
Finally, many users forget about weather conditions. High humidity or extreme temperatures can impact application. Always check the forecast before starting your project. These environmental factors can lead to unexpected results. Reflecting on each step will help improve your approach. Keep these tips in mind for successful waterproofing with liquid rubber.
Waterproofing Effectiveness of Liquid Rubber vs. Common Alternatives
This bar chart illustrates the waterproofing effectiveness of liquid rubber compared to several common alternatives. Scores range from 1 to 10, with higher numbers indicating greater effectiveness. Liquid rubber stands out as the most effective option for waterproofing solutions.
Maintaining and Inspecting Liquid Rubber Waterproofing Solutions
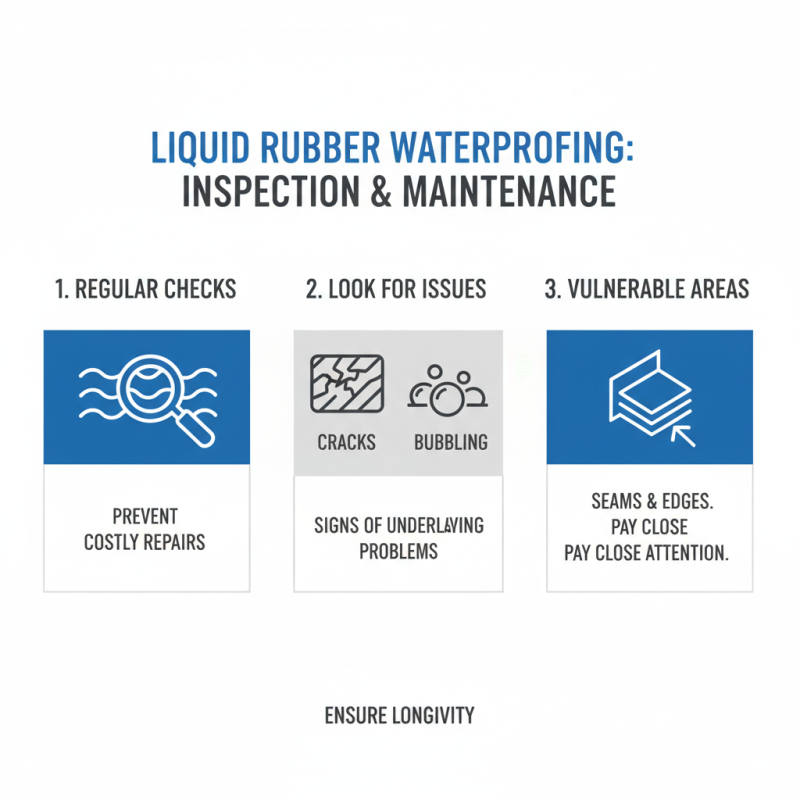
Inspecting and maintaining liquid rubber waterproofing solutions is crucial for longevity. Regular checks can prevent costly repairs later. Look for cracks or bubbling in the surface. These issues often indicate underlying problems. Pay close attention to seams and edges, as they are more vulnerable.
Tips: Always clear debris from surfaces. A clean area helps the liquid rubber adhere better. Use a soft brush to remove dust or dirt. If you notice peeling, it may be time for a touch-up. Apply a thin coat of liquid rubber to affected areas for a seamless repair.
In addition, consider the weather conditions. Liquid rubber needs warm temperatures to cure properly. Cold weather can slow down the process, leading to weak areas. Monitor humidity levels, too. High moisture can affect adhesion.