Liquid Rubber For Moulds turns a carefully prepared master into a reusable negative shape. The liquid flows around surface details, then cures into a flexible solid that can release the finished casting. The term covers several materials, including silicone and polyurethane rubber. Their properties differ, so the right choice depends on the model, casting material, and working conditions.
Special-effects maker Adam Savage has said, “The only difference between screwing around and science is writing it down.” That advice fits mould making. Record the product, mix ratio, room temperature, and cure time. Small changes can affect the result. A sticky surface or a torn edge is frustrating, but it can also reveal where the process needs attention.
In practice, success begins before pouring. Secure the master, seal porous surfaces where needed, and check whether a release agent suits both materials. Measure the components precisely; guessing by eye can leave uncured patches. Mix slowly, scrape the container’s sides, and pour in a thin stream near one corner. This helps reduce trapped air, though complex shapes may need additional techniques. Allow the rubber to cure for the full time stated by its manufacturer. Then remove the mould gently and inspect thin edges, fine grooves, and undercuts. One detail is easy to overlook: no single rubber works for every project. Understanding the material—and testing it on a small sample—makes the process more predictable.
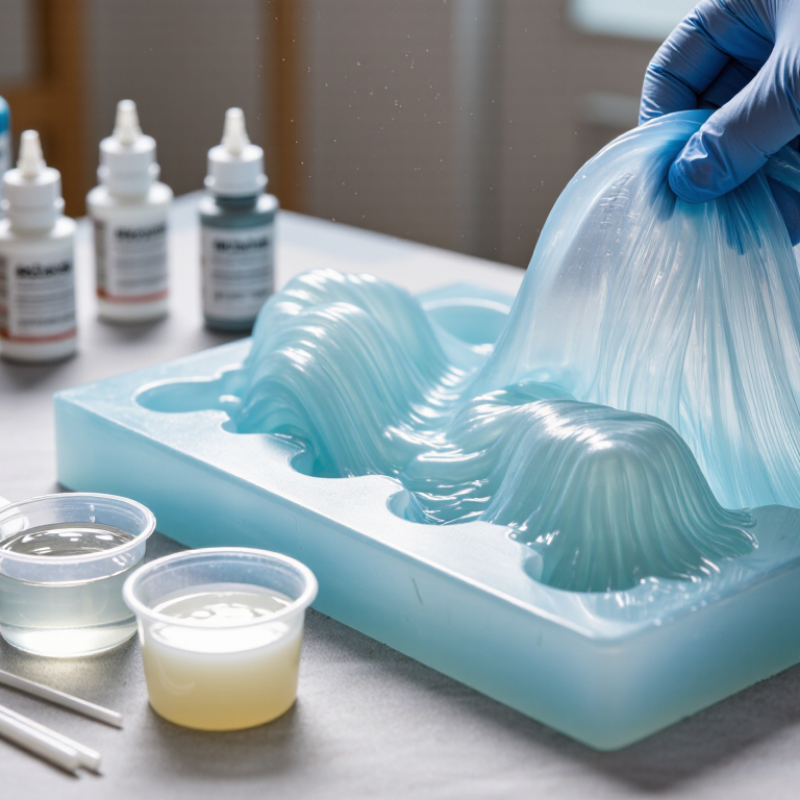
Liquid rubber for moulds is usually a two-part elastomer that cures at room temperature. After mixing, it flows around a model, captures fine textures, and changes into a flexible rubber skin. This flexibility is its defining advantage. It can release undercuts without damaging delicate details.
The material differs sharply from plaster, rigid plastics, and clay. Plaster is inexpensive, but it is brittle and absorbs moisture. Rigid plastic can last longer, yet it often needs complex mould construction. Clay remains workable, but it does not reproduce a cured, repeatable cavity. Silicone-based liquid rubber usually offers better flexibility, chemical resistance, and dimensional stability. Polyurethane rubber can provide strong abrasion resistance, though it may be less forgiving during demoulding. The boundary is not always clean. Formulation, hardness, curing temperature, and reinforcement change the result.
Industry data supports its growing use. MarketsandMarkets’ 2024 Silicone Elastomers Market report projects continued expansion through 2028, driven by manufacturing, healthcare, and consumer applications. ASTM D412 and ASTM D624 are commonly referenced for tensile and tear performance. However, laboratory ratings do not guarantee success on every pattern. I have seen excellent rubber fail because the surface contained moisture or an incompatible release agent.
Tips: Measure components by weight, not volume. Mix slowly to reduce trapped air. Test a small area first. Check cure time under actual workshop conditions. A vacuum chamber helps, but careful brushing can sometimes work better on sharp details. Read the technical data sheet, then question it against your own process.
Liquid rubber for moulds is a two-part material that flows around an original object before curing into a flexible mould. Its low viscosity captures fine textures, including shallow lettering, fabric grain, and small surface scratches. This matters when the finished cast must reproduce more than the object’s general shape.
The material’s most useful property is flexibility. A cured mould can bend around undercuts and release a detailed casting with less force. Tear resistance also supports repeated use, although thin edges can still split during removal. It must be measured accurately.
Curing creates the final rubber network. Room temperature, mixing quality, and mould thickness can affect this process. A warm, dry workspace usually helps, but excessive heat may shorten working time. Dimensional stability is another advantage, because a well-cured mould should retain its shape between castings. Some formulations also resist moderate heat, moisture, and common casting chemicals. Always check compatibility first.
In practical work, I brush a thin detail coat before pouring the main layer. This reduces trapped air near sharp features. Vacuum degassing can improve results, yet it is not always necessary for simple shapes. I have learned that rushing the mix causes more failures than the rubber itself. The surface may look cured while the deeper material remains soft. That mistake is easy to miss. A small test mould can reveal poor ratios, weak release, or unexpected shrinkage before valuable material is used.
What Is Liquid Rubber for Moulds and How Does It Work?
How to Prepare a Master Model and Choose a Rubber Compound
A reliable mould begins with a carefully prepared master model. Remove dust, fingerprints, and loose particles; even tiny marks can transfer to the finished mould. Seal porous surfaces, then check that the release agent suits both the master material and rubber compound. Apply it sparingly. Pooled release agent can soften fine details or leave a slick surface. Set the master level in a rigid mould box, with enough clearance for rubber to flow around its edges. A clean setup helps, but it is not foolproof.
Choose a compound according to the part’s geometry, expected number of casts, and working conditions. Silicone rubber often suits detailed models because it can flex around undercuts; polyurethane compounds may be preferable where greater abrasion resistance is needed. Compare the product’s technical data for mix ratio, pot life, cure time, hardness, and elongation. Grand View Research reported that the global silicone market was valued at about USD 18.2 billion in 2022, with projected growth of 6.1% annually from 2023 to 2030. That broad market figure is context, not proof that one moulding compound fits every job. Test a small sample when surface compatibility is uncertain. Annoying, perhaps. Cheaper than remaking a mould.
Typical cure times for common liquid mould-rubber compounds. The values are representative ranges converted to average hours; actual results depend on formulation, temperature, humidity, layer thickness, and the manufacturer's instructions.
How it works: A master model is cleaned, sealed, and treated with a suitable release agent before the liquid rubber is mixed and poured or brushed around it. Condensation-cure silicone is commonly used for general mould making, addition-cure silicone offers low shrinkage and good dimensional accuracy, polyurethane rubber can provide high toughness, and latex is often built up in thin layers. Select the compound according to the model material, surface detail, flexibility, durability, and required demoulding time.
Liquid rubber for moulds begins as a pourable material that captures fine surface details. It starts as liquid. After mixing, its viscosity allows it to flow around textures, edges, and shallow undercuts. A clean, dry pattern helps the rubber spread evenly. Dust, moisture, and loose particles can create weak spots or unwanted marks.
MIXING Most moulding rubbers use two components. Mixing begins a chemical reaction that changes the liquid into an elastic solid. The working time may last only a few minutes, so I pour slowly and steadily. A thin first coat can preserve delicate details, while later layers add strength. Gentle tapping helps trapped air rise. Vacuuming or pressure treatment can improve results, but careful pouring remains useful for small projects.
Curing depends on temperature, humidity, layer thickness, and accurate measurement. A cool workshop may slow the reaction, while excessive heat can shorten working time. I usually test a small batch before making a larger mould. That pause matters. Once cured, the rubber should flex without feeling sticky or brittle. However, a mould can still fail if it lacks support around deep or heavy sections. I have learned that “fully cured” does not always mean “ready immediately”; thick areas may need additional time. Small details matter. A clean release and gentle demoulding protect both the mould and the finished casting.
What Is Liquid Rubber for Moulds and How Does It Work?
Liquid rubber for moulds is usually silicone or polyurethane supplied in two parts. After accurate mixing, the components react and form a flexible negative mould around a model. The cured rubber captures fine texture, including shallow lettering and fabric grain. Grand View Research valued the global silicone market at about USD 18.3 billion in 2023, reflecting broad demand across manufacturing and casting applications.
Use begins with a clean, dry master. Apply a suitable release agent, then weigh both components carefully. Mix slowly for two to three minutes, scraping the container walls. Vacuum degassing removes visible bubbles, although small projects can sometimes work without it. Pour from one corner and let the rubber rise naturally. Select Shore A hardness by function: softer rubber suits undercuts, while firmer rubber supports larger shapes. Check viscosity, tear strength, working time, shrinkage, and temperature resistance. ASTM D624 tear testing and ASTM D412 tensile testing offer useful comparison points.
Maintenance is easy to overlook. Wash the mould gently, dry it fully, and store it flat or with internal support. Keep it away from direct sunlight, heat, and sharp edges. A thin release layer may extend service life, but excess coating can blur details. I still sometimes choose a softer rubber too quickly. That choice can improve demoulding, yet it may distort tall or heavy castings. Test a small section first. The wrong cure system can also fail against sulphur clay or certain resins, so check compatibility before committing to a full mould.
| Topic | Material or step | How it works | Typical uses or guidance | Important considerations |
|---|---|---|---|---|
| What liquid mould rubber is | Pourable or brushable elastomer | It begins as a liquid or paste, flows around a model, and cures into a flexible mould that reproduces the model’s surface detail. | Used to make moulds for casting materials such as plaster, wax, resin, and some low-melting metals. | Choose a rubber compatible with the model material, casting material, and intended production method. |
| Common type | Condensation-cure silicone | Cures through a condensation reaction, usually after its two components are mixed. | Often selected for general-purpose mould making and models where the mould needs to flex for demoulding. | Properties vary by formulation. Follow the product’s mixing ratio, cure instructions, and stated shrinkage data. |
| Common type | Addition-cure silicone | Cures by an addition reaction and is often chosen when dimensional stability and fine detail reproduction are priorities. | Useful for detailed moulds and applications where low shrinkage is important. | Some materials—including sulfur-containing modelling clay, latex, and certain amines or tin compounds—can inhibit cure. Test compatibility first. |
| Common type | Polyurethane mould rubber | Forms a flexible or semi-rigid elastomer after its components react and cure. | Can suit applications needing toughness or abrasion resistance, depending on the formulation. | Many formulations are sensitive to moisture, which can cause bubbles or surface defects. Keep components and equipment dry as directed. |
| Before mixing | Prepare the model and mould box | A sealed, stable model and leak-proof mould box keep uncured rubber in place while it flows and cures. | Secure the model, seal porous surfaces when needed, and plan a pour point and escape route for trapped air. | Use a compatible sealer or release agent only when required; test it because coatings can affect cure or surface detail. |
| Mixing | Measure and combine components | Accurate proportioning and thorough mixing help the rubber cure consistently. | Measure by the method specified for the product, scrape the sides and bottom of the container, and mix at a controlled pace. | Do not assume all products use the same ratio or measuring method. Avoid whipping air into the mixture. |
| Pouring | Fill the mould box | A slow, narrow stream allows rubber to flow around the model and gives some air time to escape. | Pour into one low point and let the rubber rise around the model where the mould design permits. | Vacuum degassing or pressure casting may reduce bubbles, but equipment and process suitability depend on the rubber formulation. |
| Curing | Allow the rubber to cure fully | Time, temperature, mix accuracy, and material compatibility affect the progress of cure. | Follow the stated pot life, cure time, and temperature conditions in the product instructions. | Do not demould early simply because the surface feels firm; incomplete cure can distort the mould or impair performance. |
| Selecting a mould | Hardness and flexibility | Softer rubber flexes more easily around undercuts; firmer rubber can better support its shape in some mould designs. | Match hardness to the model’s geometry, casting material, mould support, and expected demoulding force. | Hardness alone does not determine durability. Also compare tear strength, elongation, and the supplier’s application guidance. |
| Selecting a mould | Chemical and temperature compatibility | Rubber can swell, soften, degrade, or lose detail if exposed to incompatible casting materials or temperatures. | Check the rubber’s chemical resistance and service-temperature information against the intended casting process. | Test a small sample when compatibility is uncertain, especially with aggressive resins, solvents, or hot casting materials. |
| Maintenance | Cleaning and storage | Removing residue and storing a mould without distortion helps preserve detail and usability. | Clean with a method compatible with the rubber, dry the mould as appropriate, and store it supported away from damaging heat or sunlight. | Avoid sharp tools and unapproved solvents. Inspect for tears, tackiness, swelling, or loss of detail before reuse. |
| Release and reuse | Mould-release agent | A suitable release agent can help separate the casting from the mould or prevent bonding between mould materials. | Use it when recommended for the specific mould and casting combination. | Some releases can leave residue or interfere with later coatings, bonding, or surface finishing. Confirm compatibility first. |
Note: Cure time, working time, hardness, shrinkage, and temperature limits vary substantially by formulation. Always consult the current technical and safety data for the specific material being used.