2026 How to Choose the Right Rubber Isolation Mounts
Choosing the right Rubber Isolation Mounts in 2026 requires more than matching a load rating to a catalog number. Real equipment behaves differently from a laboratory chart. A compressor may shake hardest during startup, while a generator may create continuous low-frequency vibration. Those details change the mounting decision. Begin with the equipment weight, operating speed, vibration direction, and available installation space. Then examine whether the mount will face compression, shear, tension, or combined movement. Small errors matter. A mount that looks suitable can still transmit uncomfortable vibration through a steel frame.
Material selection also deserves careful attention. Natural rubber, neoprene, silicone, and other compounds respond differently to heat, oil, ozone, and weather exposure. Review technical datasheets from established manufacturers, not only online marketplace descriptions. Check load-deflection curves, operating temperature limits, fatigue information, and recommended safety factors. The mounting surface must remain firm and accurately aligned. Poor alignment can create uneven stress and shorten service life.
Think beyond the first installation.
A dependable selection process includes practical verification. Measure vibration before and after installation when possible. Watch for cracking, permanent deformation, loose fasteners, or unexpected noise during early operation. It is tempting to choose the stiffest option for stability, but excessive stiffness may reduce isolation performance. Softer mounts may isolate better, yet they can allow excessive movement. There is no universal winner. Engineers should compare performance, maintenance needs, environmental conditions, and total operating cost. Even experienced teams can miss a detail. That is why careful calculations, manufacturer guidance, and field observation should work together when selecting Rubber Isolation Mounts.
What Rubber Isolation Mounts Are and How They Control Vibration
2026 How to Choose the Right Rubber Isolation Mounts
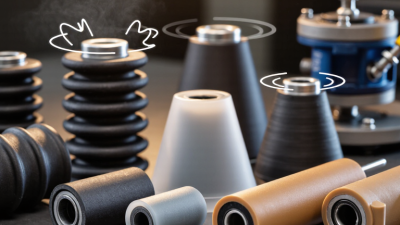
Rubber isolation mounts are flexible supports placed between machinery and its foundation. They reduce vibration by combining elastic stiffness with internal damping. The rubber deforms slightly, absorbs motion, and limits force transfer into the floor. Effective isolation usually begins when operating speed exceeds about 1.4 times the mount’s natural frequency. This principle is consistent with vibration-control guidance used in mechanical design. ISO 20816-1 evaluates machine vibration through RMS velocity, measured in millimeters per second. However, acceptable limits vary by machine type and installation condition.
In field inspections, a soft-looking mount is not always better. Excessive softness can allow dangerous movement, while excessive stiffness can transmit vibration directly. Load, temperature, oil exposure, compression set, and aging all affect performance. The European Union’s Directive 2002/44/EC identifies 0.5 m/s² as an action value for daily whole-body vibration exposure and 1.15 m/s² as a limit value. These figures are exposure benchmarks, not universal mount specifications. That distinction matters. A mount may reduce floor vibration yet leave a local resonance unresolved.
Tips: Measure vibration before choosing the mount. Record speed, load, direction, and RMS velocity. Select mounts with matched load ratings, then check deflection under real weight. Leave room for movement. Recheck bolts after commissioning. Rubber can harden quietly. That is easy to miss. For critical equipment, compare measurements against ISO guidance and obtain an engineer’s review rather than trusting appearance alone.
How to Match Mount Materials to Operating Conditions
2026 How to Choose the Right Rubber Isolation Mounts
How to Match Mount Materials to Operating Conditions
Material choice starts with the environment, not the catalog photograph. Natural rubber provides strong elasticity and effective vibration control for general indoor machinery. It can perform poorly near oils, solvents, ozone, or prolonged sunlight. That detail is often missed.
Neoprene offers better resistance to weather, oils, and moderate heat. EPDM suits outdoor equipment, water exposure, and ozone-rich areas, but it should not contact petroleum oils. Silicone tolerates wider temperature changes and remains flexible in cold rooms. However, it may provide lower tear strength under heavy movement. Polyurethane can resist wear and compression, though it may transmit more vibration than softer rubber.
Load behavior matters just as much. A mount carrying a steady vertical load needs different properties from one facing shock loads or repeated sideways movement. Check hardness, deflection, compression set, and fatigue data at the actual operating temperature. Laboratory figures alone can mislead.
I once selected a mount based mainly on load capacity. The vibration improved, but the rubber hardened near a heated housing. The design needed thermal measurements earlier. Now, I inspect oil exposure, cleaning fluids, sunlight, humidity, and nearby heat sources before sizing mounts. Small temperature changes can alter stiffness. Confirm the result with a controlled trial, because real equipment rarely behaves exactly like the drawing.
How to Calculate Load, Deflection, and Vibration Requirements
2026 How to Choose the Right Rubber Isolation Mounts
Selecting rubber isolation mounts starts with accurate load and deflection calculations. Divide the machine’s operating weight by the number of mounts, then account for uneven loading. A four-mount system may not share weight equally. Add a reasonable safety factor for movement, startup forces, and transported equipment. Do not rely only on the catalog load rating.
Deflection is linked to stiffness. Use the basic relationship: stiffness equals load divided by deflection. For vibration control, compare the machine’s excitation frequency with the mount system’s natural frequency. Greater static deflection usually produces a lower natural frequency and better low-frequency isolation. Rubber behavior changes with temperature, aging, compression, and frequency. I have seen a mount perform well during a short test but soften noticeably after continuous operation. That detail is easy to miss. Measure vibration at the actual mounting points whenever possible.
Tips: Record the real operating weight. Check vertical and horizontal loads. Identify the disturbing frequency range. Allow space for movement. Do not guess. Test one mount under working conditions before final selection. A small calculation error can create excessive movement, uneven compression, or metal-to-metal contact. Recheck the design after installation, because measured deflection may differ from the original estimate.
2026 How to Choose the Right Rubber Isolation Mounts
Load, static deflection, and estimated natural frequency for typical equipment isolation applications
Load per mount
Equipment mass × 9.81 ÷ number of mounts
Static deflection
Load per mount ÷ mount stiffness
Estimated natural frequency
fn = 1 ÷ 2π × √(k ÷ m)
Values are calculated engineering examples using gravitational acceleration of 9.81 m/s². Lower natural frequency generally improves isolation from operating vibration, but final mount selection should also consider shock loads, temperature, shear loading, preload, safety factors, and the disturbing frequency range.
How to Install, Inspect, and Replace Rubber Isolation Mounts
How to Choose the Right Rubber Isolation Mounts
Installing rubber isolation mounts requires more than matching bolt size. Confirm the equipment’s weight, operating motion, temperature, and mounting direction. Support the machine securely before removing an old mount. Never depend on a damaged mount during removal. Clean the mounting surfaces and check for rust, distortion, or trapped debris. Position the new mount evenly, then tighten fasteners to the equipment maker’s specified torque. Over-tightening can crush the rubber and reduce isolation performance.
Inspection should be part of routine maintenance. Look for cracks, hardening, bulging, tears, oil exposure, and uneven compression. A clean-looking mount can still be internally stiff. Watch the machine during operation. Excessive vibration, unusual noise, or movement may indicate incorrect loading or a loose fastener. One common mistake is judging condition by appearance alone. I have learned that small height differences can also create uneven stress. Measure the installed height when possible.
Tips: Replace mounts with the same load rating, size, and rubber specification. Replace the complete set when consistent movement matters. Keep new mounts away from sunlight, ozone, and chemicals before installation. Record inspection dates and measured defects. If the cause of failure is unclear, stop and investigate; replacing the rubber without correcting misalignment may only delay another failure. Recheck fastener tightness after the first operating cycle.